Commercial van wraps are a cost-effective and creative way of advertising a business. However, like any other marketing strategy, this one also requires careful planning and preparation. Below are some essential steps that should be taken before getting your vehicle wrapped with graphics or logos.
Exploring Your Options for Car Wraps in Houston TX
GoToSpectrum Signs & Graphics
5002 S Lake Houston Parkway Houston, Tx 77049
+17133961748
Spectrum Signs & Wraps
2855 Mangum Rd #574, Houston, TX 77092, United
+17135882591
Rocket Wraps and Signs
Address: 2313 Bauer Dr, Houston, TX 77080, United States
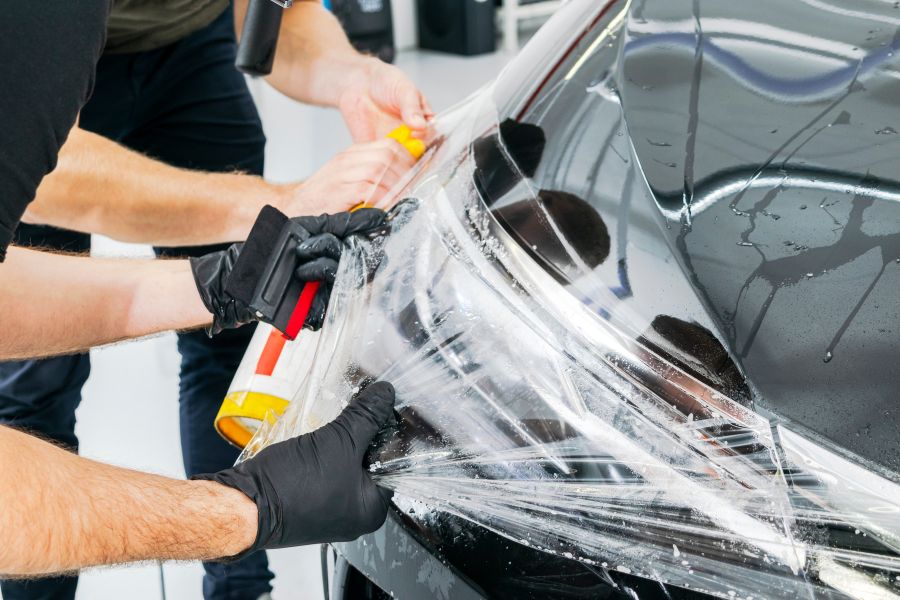
Before starting the installation process, it’s crucial to clean the van thoroughly. This includes washing off any dirt, dust, or grime on the surface of the vehicle.
markdown Use a car wash soap to remove all dust and dirt from the surface. Dry the vehicle with a microfiber towel to avoid water spots. Remove any wax residue using an automotive wax remover.
Discover the Best Vinyl Wrap in Houston TX
Next in line is addressing any body damage on the commercial van prior fitting the wrap. It’s critical to repair any scratches or dents because they can prevent proper adhesion of the wrap and lead to wrapping failure later on.
markdown Minor dents or scratches can be fixed with body filler. Severe damages may require professional help.
Exploring the World of Car Wraps in Houston Texas
The location where you park your van for installation also matters significantly. The area should be clean, dust-free, and well-lit so that installers can easily see their work and ensure a flawless application.
markdown Ideally, choose an indoor location with good lighting conditions. Avoid outdoor locations as much as possible due to weather unpredictability.
Choosing Quality Auto Wraps in Houston TX
The quality of materials used for wrapping – from adhesive vinyl to lamination film – plays a key role in determining how long your commercial wrap will last without fading or peeling off.
markdown Opt for high-quality vinyl materials that can withstand harsh weather conditions. Confirm that the materials have a good color depth and are resistant to UV rays.
Discover the Best Body Wraps in Houston TX
Lastly, make sure to hire a professional installer who has adequate experience with commercial van wraps. They would know how to handle the materials properly and ensure a smooth and bubble-free installation.
markdown Check out previous works of the installer for assurance on quality. * Make sure they are certified to install commercial vehicle wraps.
Following these essential steps can ensure that your commercial van is ready for the wrap installation process, leading to an effective, long-lasting advertisement for your business.
Commercial van wraps offer an incredibly efficient, cost-effective way for businesses to promote their brand and services. However, it’s essential to ensure some preparatory actions are taken before proceeding with the installation. This not only guarantees a smoother process but also ensures the longevity of the wrap, boosting its effectiveness as a marketing tool.
Here are some vital steps you need to follow:
Searching for Car Wraps Near Me
A crucial initial step in preparing for a commercial van wrap involves thoroughly cleaning the vehicle. This step ensures that there’s no dust, grime or grease on the surface that could interfere with adhesion.
- Wash: Start by washing the vehicle using mild detergent and warm water to remove any dirt or grime.
- Dry: After washing, dry the vehicle completely. Any moisture left on the surface can affect how well the wrap adheres to it.
- Detail: Pay particular attention to edges, seams and corrugated areas where dirt may be trapped.
Performing Necessary Repairs
Before installing your van wrap, it is critical that all necessary repairs are performed on your vehicle. Dents, scratches or any form of bodywork damage will not only affect how well the wrap adheres but also influence its overall aesthetics.
- Dent removal: Ensure all dents or creases are smoothed out as they can affect how well the wrap fits.
- Paint repair: Chips or flaking paint should be addressed as they can prevent proper adhesion of your van wrap.
Removing Accessories
Accessories such as mudflaps, badges or any exterior add-ons should be removed prior to installation. This ensures that there are no barriers to full coverage and proper bonding of the adhesive material.
- Detachable parts removal: Depending on design specifications, mirrors, wipers and moldings may need to be removed.
Choosing High-Quality Materials
Quality materials ensure durability and longevity of your commercial van wrap while offering vibrancy in colors for effective marketing.
- High-grade vinyl: Use high-quality vinyl sheets which provide better adhesion and resilience against weather elements.
Hiring a Professional Installer
While you might consider installing a commercial van wrap by yourself to save costs, hiring a professional installer guarantees precision and longevity.
- Experience: Professional installers have experience in handling different types of vehicles and shapes which ensures better fitting of wraps.
By taking these vital preparatory steps before installing your commercial van wrap, you set up yourself for effective branding while ensuring your investment lasts long term.
Before proceeding with the installation of a commercial van wrap, it is of utmost importance to ensure that any existing bodywork damage on the vehicle has been thoroughly fixed. This step is crucial for several reasons, which we shall explore in detail.
Longevity of the Wrap
No matter how high-quality your wrap material might be, its durability and lifespan will be significantly reduced if applied over damaged bodywork. Van wraps adhere better to smooth, unblemished surfaces. Any dents, scratches or rust spots can lead to premature peeling or bubbling of the wrap.
Aesthetic Appeal
To maximise the visual appeal and effectiveness of your van wrap, it is essential that it’s applied to a flawless surface. Any underlying defects in the bodywork can distort the graphics and diminish their impact. Moreover, these defects could draw attention away from your marketing message and towards the imperfections in your vehicle.
Cost-Effectiveness
While fixing bodywork damage may seem like an additional expense before installing a commercial van wrap, it is an investment that pays off in the long run. Without this preparatory step, you might face recurring costs due to frequent rewrapping because of premature wear and tear. By ensuring a high-quality installation at first go, you save on future maintenance expenses.
Professionalism
A commercial van wrap mirrors your business image. An immaculate wrap speaks volumes about your professionalism and attention to detail. On the other hand, a bubbling or peeling wrap applied over damaged bodywork can send out negative signals about your business ethics.
Here are some common types of bodywork damage that need addressing before proceeding with a commercial van wrap installation:
- Dents & Scratches: Even minor dents & scratches should be smoothed out as they can cause issues with adherence and result in an uneven finish.
- Rust Spots: Rust not only damages car paint but also hampers adhesion of wraps leading to peeling.
- Peeling Paint: Peeling or flaking paint should be thoroughly removed and repainted before installing a van wrap.
- Accident Damage: If there are any significant damages due to accidents like bent frames or cracks these need professional repair as they pose significant challenges for wrapping.
In essence, conducting thorough checks for bodywork damage and ensuring timely repairs form an integral part of preparing for a successful commercial van wrap project. The time and resources spent on this phase go a long way in enhancing the longevity, aesthetics, cost-effectiveness and professionalism reflected by your commercial van wrap.
Exploring the Best Car Wraps Shop in Houston for a Successful Commercial Van Wrap Project
The success of any commercial van wrap project is heavily contingent upon the quality of preparation carried out before installation. It’s an important phase that determines whether your van wrap comes out perfectly or not. A poorly prepared surface can lead to several problems including poor adhesion, bubbling, and premature failure of the wrap. The following are some ways in which thorough preparation contributes to a successful commercial van wrap project.
Cleaning
Before applying a new wrap to your commercial vehicle, it’s essential that the surface is thoroughly cleaned. Dirt and grime can interfere with the adhesion process, compromising the quality of your vinyl wrap installation. This could result in bubbling or peeling, which not only detracts from the appearance but can also affect the longevity of your wrap.
Surface Inspection
Part of comprehensive preparation for wrapping includes inspecting the vehicle’s surface for any areas that may need attention. These inspections unearth potential issues like rust spots, dents, and scratches that might adversely affect the outcome of your wrapping project if not promptly addressed.
A meticulous inspection facilitates early detection and correction of imperfections on a car’s exterior before commencing with the wrapping process.
Repairing Bodywork Damage
It’s crucial to repair any bodywork damage before installing a commercial van wrap. Any existing damages will only be accentuated by a vehicle wrap rather than masked. Also, these damages may create weak points where the vinyl would fail over time.
It’s key to ensure any dents are smoothed out and scratches are filled in prior to applying a vehicle wrap. This allows for an even surface which ultimately contributes to better adhesion of the vinyl.
Positioning Decals Correctly
Proper layout ensures that decals are accurately positioned for maximum impact and visibility during application. This involves aligning logos, promotional text or graphics on specific areas of your commercial van for maximum visibility and effect.
Ensuring Appropriate Working Conditions
Proper preparation also involves ensuring the right environmental conditions for the installation. The van wrap install should be done in a clean, dust-free environment at the right temperature. If the temperature is too cool, the adhesive may not stick properly. If it’s too hot, the vinyl can stretch and warp.
In summary, thorough preparation is a critical step that contributes immensely to the success of a commercial van wrapping project. It addresses potential issues that could hinder proper application and longevity of your wrap while ensuring your commercial van gives off a professional image that enhances your brand visibility on the road.
The appeal of commercial van wraps is undeniable. They offer an effective way to brand your company’s vehicles, making them not just a means of transport but also a mobile billboard for your business. However, installing a wrap on a van that already has existing damage can lead to several complications. This article seeks to elucidate potential problems that can occur when you proceed with wrapping an already damaged vehicle.
Extended Damage
One significant consequence of wrapping a damaged vehicle is the likelihood of exacerbating the existing damage. This is because the wrap will adhere directly to the surface of the van and any peeling paint or rust underneath will continue to worsen and spread, potentially causing further corrosion or paint chipping beneath the wrap.
Imperfect Appearance
Installing a commercial van wrap on a damaged vehicle may result in an unsightly appearance. Since wraps conform to your vehicle’s shape, any dents, dings or scratches will still be visible under the wrap. This could lead to an uneven or bumpy surface that detracts from your brand’s aesthetic appeal.
Shortened Lifespan
Due to the aforementioned factors, installing a wrap on a damaged vehicle could significantly shorten its lifespan. The existing issues might cause the adhesive to fail sooner than expected or compromise the integrity of the wrap itself by causing it to lift or tear prematurely.
Increased Costs
In case you decide to repair your vehicle after having it wrapped, you’ll likely have to remove and then replace part or all of the wrap depending on where the damage is located. This can end up being very costly and time-consuming process.
Here are some points for consideration: – Surface imperfections: Dents, scratches and other forms of body damage may prevent the vinyl from adhering correctly. – Corrosion: Rusty areas need attention as wraps can trap moisture leading to further corrosion. – Peeling paint: Areas where the paint is peeling or cracked need repairing before a wrap can be applied.
Last but certainly not least, damaged commercial vans can reflect poorly on your business. A well-maintained vehicle denotes professionalism and attention to detail – attributes that customers typically appreciate in businesses. In spite of the costs associated with fixing bodywork damage before proceeding with a van wrap installation, it is generally considered a sound investment in your company’s image and longevity of your vehicle.
Preparing your van properly for wrapping will ensure that you maximize the benefits of this effective mobile advertising tool. Working with professionals who can guide you through the process and help you address any pre-existing damage will lead to a superior result that truly enhances your brand’s presence on the road.
- Finding the Best Boat Wraps Near Me: A Comprehensive Guide
- Exploring Boat Wraps Designs in Houston, TX: Enhancing Your Vessel’s Appearance and Protection
- Discovering the Benefits of Car Wrap in Houston TX for Effective Business Marketing
- Essential Steps for Preparing a Car Wrap in Houston TX
- Maximizing Your Audience with Truck Wraps in Houston, TX